Five Flourishes to make your work look amazing
I know that you’ve been working hard on your flourishing, right? So now it is time to add a few more flourishes to your flourish arsenal.
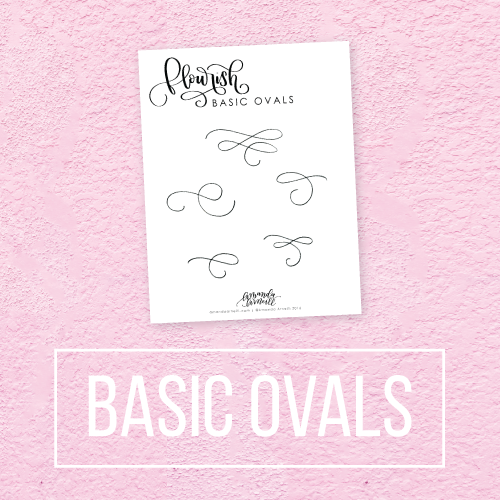
The practice sheet for today (right here) is going to be like child’s play after the flourishing that you’ve already mastered.
YOUR TOOLS
You’re going to be using your pencil and tracing paper again today. Once you print off the practice sheet, just like two days ago, overlay a piece of tracing paper on top of it and start tracing! Again, trace the curves enough to build up that muscle memory and make it possible for you to create the same curves without using the guide paper anymore.
CHEATER’S REMORSE
You might wish that you were out there creating your own flourishes. Well, let me tell you that, with flourishing, there’s not much left to invent. So rather than trying to fix something that isn’t broken, mastering these 5 basic flourishes give you the basis you need to move forward and create some beautiful pieces.

THE LINES
The flourishes are all based on continuous curve lines. If you look at the components, they are all based on simple ovals and circles (I know, from lots of Sesame Street, that a circle is an oval or the other way around or something but whatever, they’re both there).
It was like a mental block vanished from my mind when I realized that, as long as my flourishes held to the same basic ovals and circles, I could make flourishes that looked perfect every. single. time.
Today as you practice, again, focus on making those same consistent smooth lines and gentle transitions. If something looks funky, does it flow with your circles and ovals or did something go weird? Always keep the oval theory in the back of your mind as you flourish.
WORDS OF ENCOURAGEMENT
If you haven’t done the last lesson yet (life is just so darn busy sometimes!), this is the time to do it. Make sure that you’re doing the lessons in the order that I’m giving them to you. (With over a decade of teaching experience and a Masters degree in curriculum development, I have a good idea of what I’m talking about when I take stuff apart into a teachable progression. Now I sound like a pompous wiener. I’m pretty much just trying to say that I know what I’m talking about so don’t skip the steps!)
WATCH OUT AND WATCH THIS!
You may notice that my loops are not all the same size either between flourish pieces or within a single flourish itself. I like to create flourishes that actually stress inconsistency because I feel like that allows me to be the most free. So don’t worry about having consistent spacing or curves. With modern lettering, that consistency is not foundational to what we do. Phew.
The Next Step
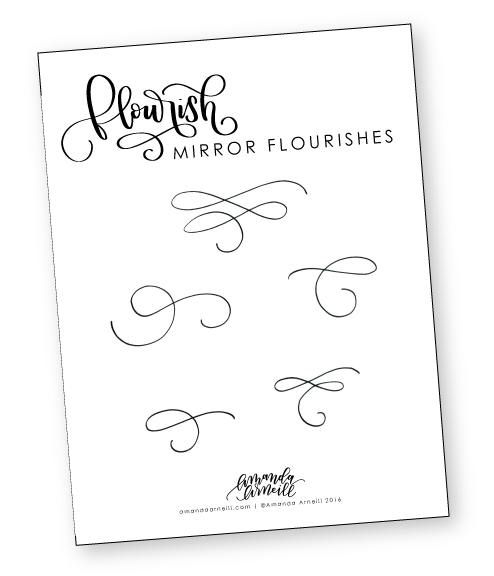
Once you can consistently make the flourishes on the tracing paper, grab some blank paper and practice drawing the shapes without tracing them. This would also be the time for you to venture out and see if you can challenge your brain a bit – try drawing these same curves in the opposite direction. I’ve included another printable right here with the flipped curves as well for you to use for some bonus practicing.
What's Coming Up
One of the best ways to add a natural flourish to your piece is to have it come off the tail of a letter like g, y, j, z and sometimes p. Make sure that you have these down before we add on that level of complexity.

