Tail Flourishing is where it's at!
Today we are taking it up a notch! While it’s lovely and beautiful to slap a flourish onto the bottom of your piece, attaching that flourish to a letter takes it to an entirely new level of awesomeness! Today we’re going to be creating flourishes to add to the ends of letters with tails (y, j, g and sometimes p or z).
YOUR TOOLS
I’m sure you’re expecting me to say, “Grab that pencil!” But today we are using a pen! There are some very important tricks to keep in mind when you’re flourishing off a letter and I can’t teach those to you with a pencil. Because you’ve been using a pencil for the past few days, you’ve built up the muscle memory that will allow you to add flourishes to the ends of your letters. What’s important is how to use pressure on the pen to create distinction between the letter and the flourish.
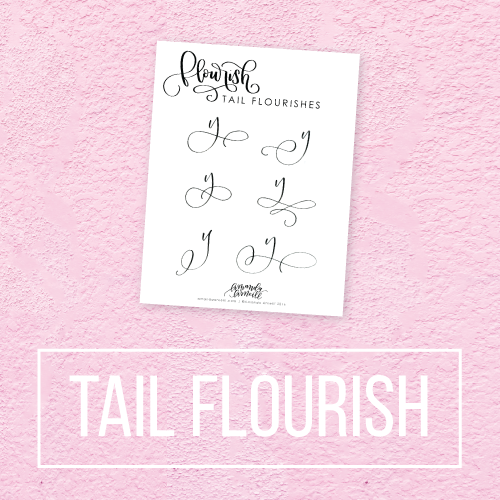
Like every other day, there is an printable sheet for you to add to your resource collection right here. You can use this to trace the shapes of the flourishes but it is best to use it more as a guide for when you attach flourishes onto your own letters.
CHEATER’S REMORSE
There’s no cheating here!! You’re going to be taking what you’ve learned and your own lettering skills and putting it altogether. Now you’re creating something that is completely your own.
Don’t worry about tracing the lines exactly. The lines are more there as a suggestion to help lead your line, not to box it in! Aim for smooth flowing curves.
THE LINES
When you are writing your letter, it is suuuper important that the tail has two distinct parts. There is the heavy downstroke of the top part of the tail (the backbone of the tail letter) and then the light flourish on the bottom. Remember that the flourish should have no pressure so it won’t compete with the actual letter itself for dominance. This will ensure that the letter is still easy to read and the flourish doesn’t make it hard to tell where the letter actually ends.
WORDS OF ENCOURAGEMENT
Tail flourishing is going to make your lettering look bombdotcom. So put in the extra time to get this right because, once you master it, you’re going to be a flourishing bandit!
WATCH OUT AND WATCH IT!
The trickiest part of this is nailing that transition zone between the heavy downstroke and the light pressure of the flourish. Because a flourish isn’t always moving in the upwards direction (and therefore with no pressure like any other upstroke), it can be easy to extend the downstroke just a little too far. If your letter looks heavy in any way, try pulling the pressure off just a little bit earlier. In the video below, I demonstrate the different pressure transition points so that you can see what I mean.
One other thing that I see a lot is trying to squish big flourishes into a small space. It’s like putting an elephant into a peanut butter jar (I could totally go for some peanut butter right now!). Make sure that your lines flow and are wide enough that they look natural, not cramped or forced.
THE NEXT STEP
Try to create the different tails on each of your tail letters. While the practice sheet shows the tails on a “y”, you also want to be able to use them on your g, j, p and z (though p and z can sometimes be a bit trickier. My general rule of thumb is, if it is still legible, you’re good to go!!).
WHAT’S COMING UP
After mastering this, you can look at connecting flourishes with cross strokes. Not sure what I mean? Well, it will all be made clear (and your flourishing will be the talk of the town!)


